
-
Markforged Desktop Printers
-
- How to Level the Print Bed on a Markforged Desktop 3D Printer
- Markforged Desktop - Bed Level Test Print
- Markforged Desktop - Adjust Z Offset
- How to Replace the Plastic Nozzle on a Markforged Desktop Printer
- How to Replace the Plastic Bowden Tube on a Markforged Desktop Printer
- How to Replace the Plastic Feed Tube on a Markforged Desktop Printer
- How to Replace the Fiber Nozzle on a Markforged Desktop Printer
- How to Replace the Fiber Bowden Tube on a Markforged Desktop Printer
- How to Replace the Fiber Feed Tube on a Markforged Desktop Printer
- Proper Belt Tension for Markforged Desktop Printer
- Update Firmware - Markforged Desktop 3D Printer
- Desktop - Adjust Fiber Nozzle Height
-
- Properly Prepare Desktop Print Bed - Markforged
- How to Load Plastic Filament - Markforged Desktop
- Load Fiber - Markforged Desktop Printer Utility
- How to Start a Print Job on Markforged Desktop 3D Printer
- How to Safely Remove Printed Parts - Markforged Desktop 3D Printer
- How to Unload Plastic - Markforged Desktop 3D Printer
- How to Unload Fiber - Markforged Desktop 3D Printers
- Markforged Desktop - Washing Build Plate
-
- Troubleshooting Common 3D Printing Issues - Markforged Desktop 3D Printer
- How to Clear a Plastic or Fiber Material Jam - Markforged Desktop 3D Printer
- How to Perform a Wet Plastic Purge Test Print - Markforged Desktop
- How to Run the Under extrusion Troubleshooting Utility on Markforged Desktop 3D Printers
- Markforged Desktop - Onyx Pillars Test Print
-
-
Markforged Industrial Printers
- How to Laser Level the Print Bed on Markforged Industrial
- How to Load Plastic in a Markforged Industrial 3D Printer
- Fiber Nozzle Height Adjustment - Markforged Industrial Series 3D Printer
- How to Adjust Belt Tension on the Markforged Industrial Printer
- How to Adjust Laser Offset - Markforged Industrial 3D Printer
- How to Upgrade Markforged X7 Gen1 for Turbo Print
- Introduction to Inspection - Markforged Industrial Series 3D Printer - Eiger
- Z-Axis Calibration Utility - Markforged Industrial Series 3D Printer
- How to Resolve a Calibration Offset Error on Markforged X3, X5, and X7 Industrial Composite Printers
- Calibrate Motor Encoders - Markforged Industrial Series 3D Printer
-
Markforged Metal Printers
-
- Overview & Operation of the Metal X Printer | Markforged Metal X 3D Printer Getting Started 1/8
- Metal X Printer Common Maintenance & Troubleshooting | Markforged Metal X 3D Printer Getting Started 2/8
- Adjust Belt Tension
- How to Adjust the Release Nozzle XY Offset - Markforged Metal X 3D Printer
- Markforged - Replace Metal X Metal Nozzle
- How to Replace the Release Nozzle - Markforged Metal X Printer
- Markforged Metal X Motion Maintenance
- Replacing Lower Metal Feed Tube - Markforged Metal X Printer
- Clearing a Markforged Metal X Material Jam - Markforged Metal X 3D Printer
- Clearing a Release Nozzle Jam - Markforged Metal X 3D Printer
- Wiping Station Maintenance - Markforged Metal X Printer
- Sinter Common Maintenance & Troubleshooting | Markforged Metal X 3DPrinter Getting Started 8/8
- What to Expect After Markforged Metal X Purchase
-
- Wash-1 Process Overview and Basic Operation | Markforged Metal X 3D Printer Getting Started 3/8
- Wash Job Tracking - Markforged Metal X 3D Printing
- Wash-1 Common Maintenance & Troubleshooting | Markforged Metal X 3D Printer Getting Started 4/8
- How to Load Solvent - Markforged Metal X 3D Printer Wash
- Proper Drain Procedure - Markforged Metal X 3D Printer Wash
- Troubleshooting HTC OVER LIMIT Alarm
-
- Sinter-1 Gas Regulator Setting Utility - Markforged Metal X 3D Printer
- Replace Sinter-1 Exhaust Filter
- Metal X Clearing an Exhaust Clog - Sinter-1
- Troubleshooting Sinter-1 Firmware Errors - Markforged Metal X 3D Printer
- Sinter Gas & Gas Panel Overview | Markforged Metal X 3D Printer Getting Started 7/8
- Sinter Process Overview | Markforged Metal X 3D Printer Getting Started 5/8
- Sinter Oven Basic Operation - Markforged Metal X 3DPrinter Getting Started 6/8
-
-
Markforged FX20
-
Markforged Materials
-
Markforged Software
-
Design for Additive
- ___Contact Support
- ___Markforged University
- Anatomy of a 3D Printed Part
- Layer Height - Understanding How Your Markforged 3D Printer’s Hardware & Software Components Contribute to its Performance
- Minimum Feature Size - Understanding How Your Markforged 3D Printer’s Hardware & Software Components Contribute to its Performance
- Precision and Accuracy - Understanding How Your Markforged 3D Printer’s Hardware & Software Components Contribute to its Performance
-
Formlabs SLA Printers
-
Formlabs SLS
- Articles coming soon
-
Formlabs Materials
- Articles coming soon
5 Things To Know About Markforged Onyx ESD
Markforged has released an exciting new polymer for Industrial printers called Onyx ESD. Here are 5 things you need to know about this new material.
1. Electrostatic Safe – Onyx ESD is neither an insulator nor a conductor. The material is designed to possess a precise range of electrical resistance properties to allow the discharge of static electricity that might build up and damage sensitive circuitry. Onyx ESD is the perfect material for any part that interfaces directly with circuit boards such as fixtures or housings.
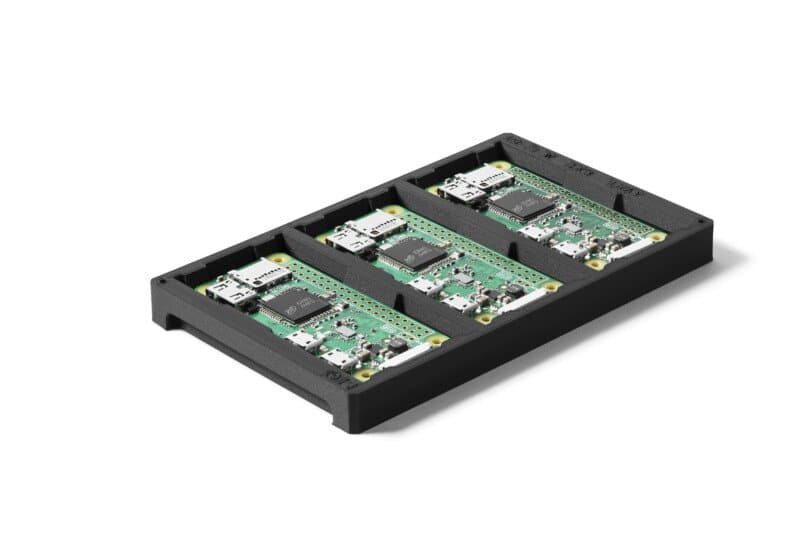
2. Strength – The Onyx ESD polymer is stronger and stiffer than any other Markforged base material, making it suitable for a wide range of parts beyond just electronic equipment. Flexural Strength is 83 MPa vs 71 MPa for standard Onyx.
3. Reinforcement – Onyx ESD polymer can be reinforced with any continuous fiber reinforcement material and still retain its ESD rating, meaning parts can be built up to 10x stronger than any other ESD material available on the market.
4. Ready to Use – The Onyx ESD material can be ordered now! The latest Eiger update provides Onyx ESD as an option so you can start checking part costs with the new polymer now!

Technical Support
Get help from our team by Calling us at 800-364-1652 x 4. You can also get assistance by clicking the Technical Support button or the Email Our Experts button below.