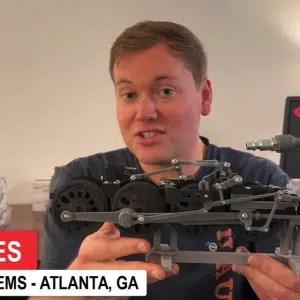
3D printing has revolutionized the way we approach model making, providing new opportunities to bring intricate designs to life. In my latest project, I dove into constructing a 3D printed steam locomotive G scale model—a venture that combined meticulous planning, precise design, and the right printing technologies.
Designing the Stand for the Locomotive Model
To ensure the functionality and testing of my 3D printed model, I began by designing a stand. This was crucial for stability, allowing me to easily identify the model’s center of mass. After detailed calculations, I concluded that the fulcrum was centered between driving wheel A and B. The stand was then crafted to not only support the model but also limit side-to-side and back-and-forth movements, providing a stable platform for further testing.
Choosing the Right Printing Technologies
Selecting the appropriate printing technology for each component was pivotal. I had to decide where each part would be printed, taking into account the specific characteristics of the different printers available. My plan unfolded during the modeling phase as I progressively made these decisions:
Chassis and Wheels: To achieve durable and precise prints for the chassis and wheels, I opted for Onyx on the Markforged X7. These components benefit from the strength and dimensional accuracy that this material and printer combination offers.
FDM Printing Preferences: For parts with simple geometry and identifiable flat faces, FDM printing was the go-to choice. Round parts, in particular, tend to turn out better with this method compared to SLA, maintaining their true roundness.
For Intricate Parts: When it came to linkages and components with minimal clear orientation, SLA printing proved more effective. The Formlabs Form 4 was chosen for its ability to handle thin geometries and detailed prints.
Optical Clarity for Cylinders: SLA was selected again for cylinders because they required optical clarity—something SLA’s capability paired with Formlabs Clear V5 resin excels at.
Finalizing and Mirroring Components
With printing decisions in place, the next task was to mirror components that had side-specific geometry. This included essential parts like the cylinder, crosshead/drive piston assembly, crosshead guide, chassis, drive wheel C, expansion link, and the support beams.
Ordering and Assembling Components
The final preparatory step was to compile a bill of materials for all the required hardware. This standardized documentation ensured that nothing was overlooked when placing the order with McMaster-Carr, preparing for the assembly of the model.
Embarking on the Printing Process
With meticulous plans and orders set, the printing process commenced. Each part, identified and designated to the most suitable printer, was brought to life, paving the way to construct the steam locomotive model with precision and enthusiasm.
In conclusion, this project wasn’t merely about assembling a collection of printed parts; it represented a fusion of creativity and engineering—each decision contributing to the integrity and realism of the steam locomotive G scale model. The blend of technology and meticulous modeling highlights the potential of 3D printing in modern model creation.
More in this Locomotive Webinar Recap
-
-
- Designing a 3D-Printed Steam Engine You Can Power With Compressed Air (Big Boy Inspiration)
- Designing Working Walschaerts Valve Gear in SOLIDWORKS: Validating Link Lengths, Lap & Lead
- Choosing FDM vs SLA for a 3D Printed Model: Stand Design, Part Planning, and Hardware Prep
- Crafting a G-Scale Replica: Designing the Iconic Big Boy Locomotive
- Designing and Testing Linkages in SOLIDWORKS: Clearances, Mates, and 3D-Printed Fit Checks
- Assembling a 3D-Printed Steam Engine Valve Gear: Fits, Clearances, and Iteration
- Why My 3D-Printed Steam Locomotive Kept Stalling (And How Quartering Fixed It)
-