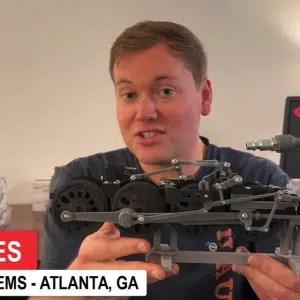
The world of 3D printing has opened a new horizon in model assembly, and when it comes to assembling a steam locomotive from scratch, the process can be as exhilarating as it is challenging. This blog post walks through my journey of creating a fully functioning steam locomotive model using 3D printed parts, thanks to Markforged’s elite carbon fiber nylon and some careful assembly techniques. Let’s dive in!
Overnight Printing Success
The process began with the X7 3D printer working tirelessly overnight. It’s a comfort knowing that parts were being manufactured hands-free, allowing me to wake up to fresh, ready-for-action components. The result was a stunning set of parts, leading me to give the material a five-star rating.
Preparing the Parts
Once the printing was complete, I eagerly peeled the parts off the build platform. The first task was to remove supports from various components like the drive wheel axles, support beams, and drive wheels. Using flush cutters, I also tackled the resin parts, ensuring a clean and precise removal job.
With a 0.4-millimeter clearance designed into the model, the mating parts like the connecting rod fit perfectly. I kicked off the assembly by installing bearings into their blocks and test fitting them into the chassis. The fit was impeccable.
Fitting the Drive Components
The next task involved installing the drive wheel axles into the wheels, which demanded some finesse due to minor issues like flashing and stubborn support material. Despite this, the sub-assemblies eventually found their place in the bearings without issue.
An interesting point during assembly was the need to reprint the drive wheel axles twice to ensure a snug fit with the bearings. The ability to iterate quickly using 3D printing made this adjustment seamless.
Assembling the Core Structure
With the wheels securely glued to the chassis, I began attaching the connecting rod after modifying it to fit onto the crank shaft. The lifting arm beam was then secured using hex nuts and screws, reinforcing the structure significantly.
Testing the crosshead guide’s motion revealed smooth operation, a testament to the precisely modeled clearances. The integration of each moving part was checked at every major step to ensure everything from motion to clearance was up to standard.
Printing and Final Preparations
A crucial part yet to be printed was the cylinder. Once prepared and printed in the intriguing clear V5 material, I continued by refining the piston fits through careful sanding. Achieving the right clearance was critical to prevent air leaks while ensuring smooth travel within the cylinder bores.
Completing the Locomotive
The assembly continued systematically, installing the expansion link beam and carefully integrating the various linkages, ensuring each movement was free and unhindered. The reversing mechanism was a highlight, requiring a thoughtful build to ensure it operated correctly.
Finally, attaching the pistons to their shafts was no easy feat. They needed substantial sanding due to their tight clearance tolerances, which were necessary for optimal air control and smooth operation within the clear cylinders.
Conclusion
Assembling a steam locomotive model from 3D printed parts was a meticulous yet rewarding project. Not only does it demonstrate the power and precision of modern 3D printing technology, but it also highlights the joy of bringing a digital model to reality. Each step, from planning to execution, contributed to the creation of a beautifully functional model that captures the essence of a steam locomotive with striking accuracy.
More in this Locomotive Webinar Recap
-
-
- Designing a 3D-Printed Steam Engine You Can Power With Compressed Air (Big Boy Inspiration)
- Designing Working Walschaerts Valve Gear in SOLIDWORKS: Validating Link Lengths, Lap & Lead
- Choosing FDM vs SLA for a 3D Printed Model: Stand Design, Part Planning, and Hardware Prep
- Crafting a G-Scale Replica: Designing the Iconic Big Boy Locomotive
- Designing and Testing Linkages in SOLIDWORKS: Clearances, Mates, and 3D-Printed Fit Checks
- Assembling a 3D-Printed Steam Engine Valve Gear: Fits, Clearances, and Iteration
- Why My 3D-Printed Steam Locomotive Kept Stalling (And How Quartering Fixed It)
-