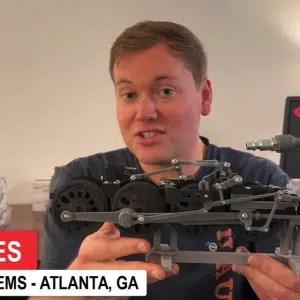
Designing a painstakingly accurate scale model of the Big Boy locomotive is no small feat. This American railway giant not only played a pivotal role in World War II efforts but also stands as a monumental achievement in engineering. With its robust design and legendary status, recreating this steam engine as a G-scale model demands a delicate balance of precision and patience. Here’s how I embarked on this journey, transforming a sketch into a tangible model.
The Blueprint Beginnings
The process began with securing an authentic side-view sketch of the Big Boy locomotive. Fortunately, the blueprint I found was as precise as they come. I started by importing this image into PowerPoint, adjusting the length to match our intended scale before transitioning to SolidWorks for more detailed work. A new assembly was opened, and a sketch was created on the front plane to host this image, guiding our dimensions and layout.
Scaling the Giant
Ensuring accurate dimensions is critical, especially when dealing with extensive machinery. For the Big Boy, the real engine stretches 85 feet and 3.5 inches. Opting for 1:32, or G-scale, the length shrinks to about 32 inches or 812.4 millimeters. This mirroring served as a foundation for developing the left side, positioning the wheels and driving systems accurately.
The Rolling Mechanics
At the heart of the locomotive are its wheels. Designing began with the first primary wheel—Wheel A. It formed the template for the subsequent three wheels, with each serving as a variation. Using the ‘Save as copies’ feature allowed modifications, adjusting counterweights or adding specific components like the pivot shaft without altering Wheel A’s design.
Assembling with Precision
Spacing was crucial, especially between wheels. Temporary distance mates arranged Wheels B, C, and D with meticulous accuracy, at 57.7 millimeters apart. Such precision bled into designing the chassis, bearing blocks, and wheel axles, demanding scrutiny every step to keep reality in check.
Bearings and Blocks
Thanks to resources like Jake at Animographs and his detailed exploration of the Big Boy, confidence and insight grew. Bearings, specifically 8 by 16 by 5 millimeter shielded ones from McMaster, were selected, offering seamless integration into the model. Simplifying these components in SolidWorks reduced complexity, expediting assembly without sacrificing functionality.
The Chassis Craft
With bearings aligned, the chassis design continued, following the rail gauge—45 millimeters for G-scale—to ensure compatibility. This phase required a precise dance of concentric and coincident mating, aligning axles and bearings to form a cohesive, functional unit.
Bringing It All Together
The fastening of the chassis to wheel axles and bearings marked the culmination of meticulous detailing. Ensuring full constraint of the chassis, I double-checked alignments, confirming each part was perfectly mated and integrated, a testament to precise and iterative design.
Designing a G-scale replica of the Big Boy showcased not just the art of scaling but also the intricate relationship between digital design and tangible outcomes. Each step vastly benefited from careful planning and expert insights, yielding a proportional homage to one of history’s most remarkable steam engines. Whether you’re an enthusiast or a model aficionado, diving into such projects illuminates engineering marvels of past eras in a new light.
More in this Locomotive Webinar Recap
-
-
- Designing a 3D-Printed Steam Engine You Can Power With Compressed Air (Big Boy Inspiration)
- Designing Working Walschaerts Valve Gear in SOLIDWORKS: Validating Link Lengths, Lap & Lead
- Choosing FDM vs SLA for a 3D Printed Model: Stand Design, Part Planning, and Hardware Prep
- Crafting a G-Scale Replica: Designing the Iconic Big Boy Locomotive
- Designing and Testing Linkages in SOLIDWORKS: Clearances, Mates, and 3D-Printed Fit Checks
- Assembling a 3D-Printed Steam Engine Valve Gear: Fits, Clearances, and Iteration
- Why My 3D-Printed Steam Locomotive Kept Stalling (And How Quartering Fixed It)
-